How to Color in Procreate Without Going Over Lines
This post may contain affiliate links
In preschool, I remember that one of the best compliments you could get was about successfully coloring inside the lines. Maybe I was a weird kid, but I was into art and a perfectionist, so it makes sense. Luckily, with technology, coloring inside the lines has never been easier. Here's how to color inside the lines with Procreate.
To color inside the lines with Procreate, use ColorDrop to fill your shape with white. Turn on Alpha Lock or create a Clipping Mask, which will stop you from coloring outside of the lines of that shape. Another method is to use the Automatic Selection tool, clicking on the shape you wish to color.
If you want the ever-prestigious preschool award for being the best at coloring within the lines, keep reading. It's actually fairly simple to do with Procreate, though getting there isn't always intuitive. So, keep reading to learn two ways to color within the lines with Procreate.
Important note: the methods we're going to discuss require coloring one layer at a time. If all of the elements you want to color aren't on the same layer, just switch between whichever layers you need.
Color in the Lines with Procreate's Clipping Masks
Procreate's Clipping Masks allow you to color inside the lines of your shapes without permanently making changes to your shape. Instead, your coloring stays on a new and separate layer. This makes it easier to change the coloring you've applied to your shapes.
The Clipping Mask feature is my personal favorite way to color within the lines. It's quick, easy, and gets the job done without making permanent changes to your shapes and art. There's an important caveat though, so Iet's dig into that a little deeper.
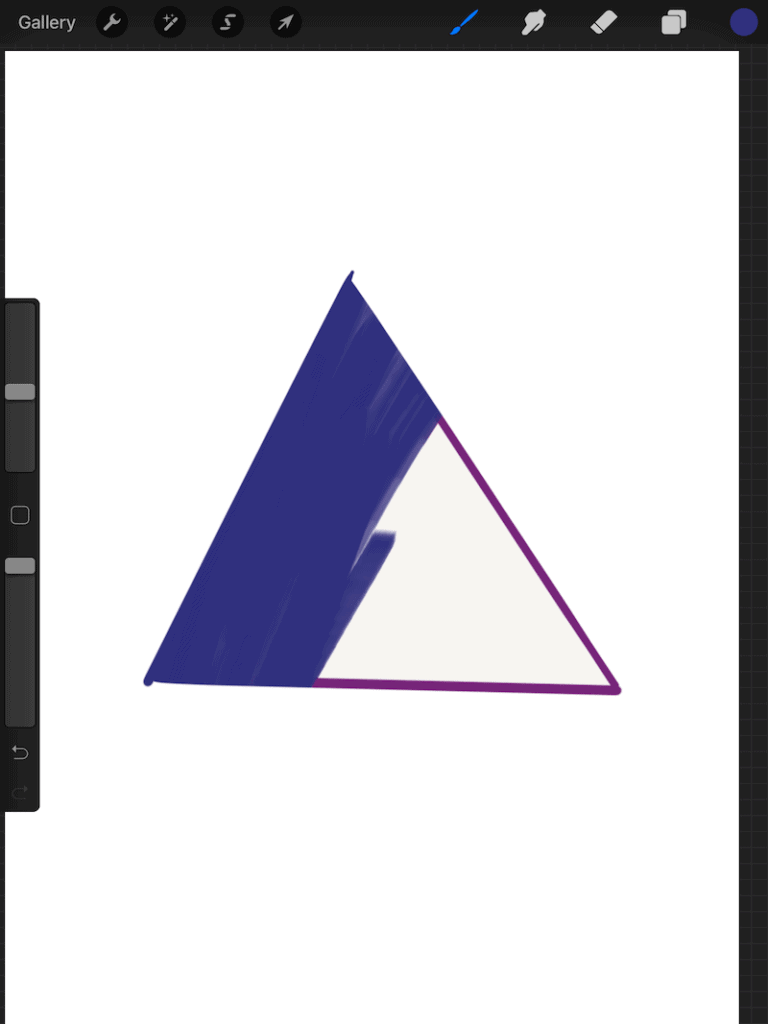
With Clipping Masks, you can ONLY color over pre-existing brush strokes. This means that if your element is simply an outline that isn't filled in, you will not be able to color inside of it. You could recolor the outline, but nothing that isn't already painted.
You're probably thinking that this negates the whole benefit of Alpha Lock, but it doesn't. It just adds another step that you'll have to keep in mind. Here's how to color in the lines with Alpha Lock, step-by-step:
1. Draw your elements.

2. Use ColorDrop to fill in your element with paint. Choose whichever color makes sense for your piece of art.
3. Open the layers panel and create a new layer. Make sure this layer is right above the layer that contains the elements you want to color.

4. Click on the new layer to open its settings.
5. Click on Clipping Mask.
6. Apply all of your coloring on this new Clipping Mask layer.

Clipping Masks are great tools to use because they give you a lot of freedom. Everything is on a separate layer, which makes your life a LOT easier if you want to make any changes.
That said, there is another, more permanent, way to color inside the lines. Let's talk about it!
Color in the Lines with Procreate's Alpha Lock
Procreate's Alpha Lock feature makes it so that you can only color on the elements on that given layer. Alpha Lock will only allow you to color on pre-existing brush strokes, so it's important to use ColorDrop to apply a colored base to your elements ahead of time.
Similar to the Clipping Mask, the Alpha Lock feature only allows you to color over pre-existing brush strokes. So, we still need to make sure that a base color has already been applied to our shapes. If no color is there, fill it with white, or the same color as your background.
There's also a VERY important feature of Alpha Lock function that differentiates it from Clipping Masks. With Alpha Lock, your changes are applied directly to your shape. They are NOT on a separate layer. This makes your changes more permanent. Be careful with that!
Let's look at this step-by-step:
Recommended Procreate Tools
These are my favorite Procreate tools that I wouldn't be able to live my Procreate life without!
- Skillshare:I take a LOT of Skillshare classes and they are the reason that I started using Procreate in the first place. These classes are amazing and you can take them for FREE! Click here to get a 30 day free trial of Skillshare
- Matte Screen Protector:these matte screen protectors will make your iPad screen feel more like traditional paper. Click here to find them on Amazon! Make sure to get the right size for your iPad model.
- Printful:it's SO rewarding to see your own art on a shirt, mug, sticker, poster, and so much more. Whether you want to start selling your art and sharing it with the world, or you just want a gift for yourself or a friend, having a great printer is important. Printful is my favorite print provider, offering a ton of high quality products to print your own art on. Check them out and sign up for a free account here!
1. Draw your elements.
2. Use ColorDrop to fill in your element with paint. Choose whichever color makes sense for your piece of art.
3. Open the layers panel and click on the layer that has the elements you want to color in on it. This will open the layer settings.
4. Turn on Alpha Lock.

5. Leave Alpha Lock on for the entirety of your coloring.
Simply turn the Alpha Lock off when you need to color outside of the lines, and turn it back on when you do. Repeat this process for whichever layers you need.
While this is my preferred method, you might find that you need a way to color within the lines of your elements without filling them in with color beforehand. Is there a way to ditch the ColorDrop step, while still getting the perks of staying within the lines?
Luckily, yes. That said, there's a VERY important difference between these two methods, so be sure to keep reading all the way through.
Color in the Lines with Procreate's Select Tool
Click on the Select tool in Procreate's top toolbar. Make sure that Automatic is selected. Tap inside of the element you want to color. Select your paintbrush, and start coloring. With your element selected, you won't be allowed to color outside of it.
If you don't want to fill your elements with ColorDrop beforehand, this is the way to color in the lines. Here's how to do it, step-by-step.
1. Make sure the layer that contains the elements you want to color is selected.
2. Click the Select tool in the top toolbar.
3. Choose Automatic in the Select settings.

3. Click inside of the element you want to color.
4. Use your finger and slide it to the right of your screen to increase the selection threshold. Go as high as you can without it flipping over to the background.
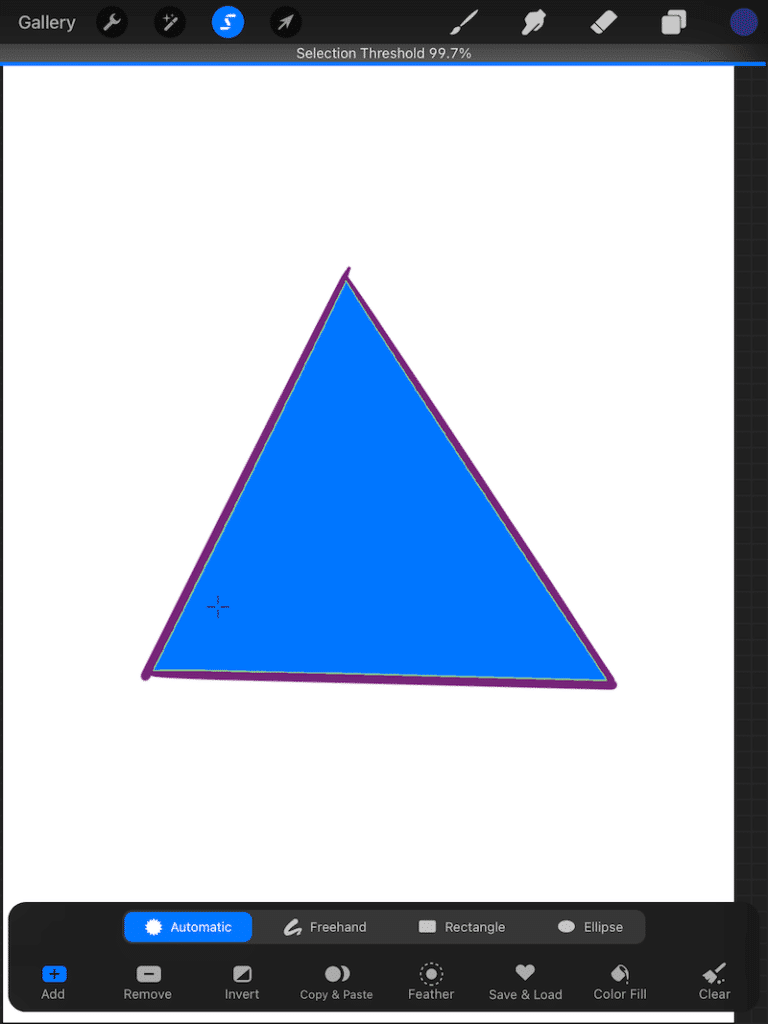
Important note: you have to slide your finger within the element you just selected. If you do it outside of it, it will create another selection of what you just touched.
4. Click the paintbrush and start painting your elements.

5. When you're done, click the Select tool again to deselect it.
Simply repeat this process for any elements that you need to color. Even though it's a multistep process for each element you want to color, it's pretty quick once you get the hang of it.
Alright, so we just talked about two strategies for coloring in the lines. Why would you pick one over the other?
There's a REALLY important difference between these two methods:
The Alpha Lock coloring option will let you color over your outline. The Selection coloring option won't. Choose your method based on whether you want to color over your outline or not.
There are other reasons why you'd want to use one or the other, so here's a summary:
Alpha Lock Option
-You want to color over your outlines.
-You already have your elements filled with color, or you don't mind filling them.
-You have a number of different, separate elements you need to color and you want to color them all at once without selecting and deselecting them over and over again.
Select Tool Option
-You don't want to color over your outlines.
-Your elements aren't filled with color yet, and you don't want to fill them.
-You have a small number of elements that you need to color.
Depending on what you're creating, it's possible that you'll use both coloring methods within the same art piece. As you can see, one is more efficient than the other depending on the circumstances and what you're planning to color.
Before we finish up, I have to give a shout out to my FAVORITE place to learn art – Skillshare. If you're looking for effective classes, with amazing teachers, at a low cost (or even free), you need to check out Skillshare. It's where I first learned Procreate…and continue to learn Procreate! I feel like I will be a lifelong Skillshare learner.
I can't say enough great things about Skillshare! Luckily, you can see how great it is for no cost. When you grab a free trial of Skillshare, you'll get unlimited access to all of the Skillshare has to offer. It's really amazing given how much you can learn.
Grab a free trial of Skillshare here!
Given technology these days, we don't need to worry about coloring inside of the lines anymore. Simply click a few buttons, and Procreate has it covered for you. Have fun experimenting with these coloring techniques and how they can make your art cleaner, crisper, and more efficient.
Whatever you do, make sure to have fun with Procreate!
How to Color in Procreate Without Going Over Lines
Source: https://adventureswithart.com/color-inside-lines-procreate/
0 Response to "How to Color in Procreate Without Going Over Lines"
Post a Comment